
Chilli Pooris
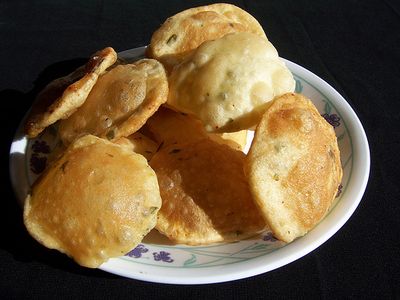
North India's chilli pooris: small wholemeal flatbreads spiced with chilli and ajwain, deep-fried till they puff into golden balloons.
Overview
Pooris are magical bread, simple dough that transforms into puffy, crispy-outside, tender-inside spheres when fried in hot oil. This version combines whole wheat flour with plain flour for nuttiness and texture, and adds fresh red chilli for heat. The dough is forgiving and requires no yeast; the high temperature of the oil creates the puff. Serve hot immediately, either plain or with curries, dals, and pickles. These are best made just before serving.
Ingredients
Dry Ingredients
- 115 grams plain all-purpose flour
- 115 grams wholemeal flour
- ½ teaspoon fine sea salt
- ½ teaspoon mild chilli powder
Wet Ingredients & Flavoring
- 2 tablespoons vegetable oil
- 1 fresh red chilli (de-seeded and finely chopped)
- 100 ml water (plus an additional 20 ml if needed)
For Cooking & Serving
- Vegetable oil (for deep frying, approximately 500 ml)
Method
Stage 1 - Mix Dough
- Sift the plain flour, wholemeal flour, salt, and chilli powder into a large bowl.
- Add 2 tablespoons vegetable oil to the dry ingredients.
- Gradually mix in water, a little at a time, until you have a firm dough.
- Important: The dough should be firm, not sticky; if it's too sticky, it won't puff. Add water conservatively.
Stage 2 - Knead
- Turn the dough out onto a lightly floured surface.
- Knead firmly for 10 minutes until it is smooth, elastic, and springy.
- The dough should feel silky and responsive to pressure.
Stage 3 - Rest
- Place the dough in a lightly oiled bowl.
- Cover with cling film.
- Leave to rest for 30 minutes at room temperature (this allows gluten to relax).
Stage 4 - Incorporate Chilli & Divide
- Turn the dough out onto a lightly floured surface.
- Knead in the finely chopped fresh red chilli, distributing it evenly throughout the dough.
- Divide the dough into 12 equal pieces (approximately 25g each).
- Keep the pieces covered to prevent drying.
Stage 5 - Roll
- Working with one piece at a time, roll it into a thin disc approximately 13 cm (5 inches) diameter.
- Keep the discs between sheets of cling film to prevent sticking and drying out.
- Stack the rolled pooris between layers of cling film.
- Important: Keep uncooked pooris covered; they dry out quickly and won't puff when fried.
Stage 6 - Heat Oil & Prepare
- Pour oil into a deep pan (or wok) to a depth of 2 ½ cm (1 inch).
- Heat the oil to 180°C.
- Temperature test: A cube of day-old bread added to the oil should brown in approximately 40-45 seconds; if faster, oil is too hot; if slower, oil is too cool.
- Preheat the oven to a low 100°C (this keeps cooked pooris warm while you finish frying).
Stage 7 - Fry
- Using a spatula or spoon, lift one poori and slide it gently into the hot oil.
- The poori will initially sink, then rise and begin to sizzle.
- Key step: Using the back of the spatula, gently press the poori into the oil; this helps it puff up dramatically and cook evenly.
- The poori should puff into a balloon within a few seconds.
- Turn the poori over after 3-5 seconds and cook the second side for 20-30 seconds until pale golden.
- Don't overcolor: Pooris should be pale golden, not dark (dark means they've cooked too long and will be hard).
Stage 8 - Drain & Keep Warm
- Remove the cooked poori from the pan using tongs or a spatula.
- Drain on kitchen paper, placing it on several layers to absorb oil.
- Keep warm in a preheated 100°C oven while you cook the remaining pooris.
- Pooris are best served hot immediately; they soften as they cool.
Notes
- Oil Temperature: This is critical; too cool and the pooris won't puff; too hot and they brown before cooking through. Use a thermometer.
- Firm Dough: The dough must be firmer than typical roti or bread dough; this allows proper puffing when fried.
- Fresh Chilli: The fresh chilli adds flavor and heat; de-seed if you prefer milder results.
- Puffing Technique: Gently pressing the poori into the hot oil with a spatula encourages it to puff upward and cook evenly on both sides.
- Serving Immediately: Pooris crisp outside and soften as they cool; ideally eat them within minutes of frying.
- Flour Balance: The mix of whole wheat and plain flour creates nice texture; all plain flour works but is blander.
Variations
Spicier Heat: Add ½ teaspoon chilli powder to the dough, or use red chilli powder instead of mild. Plain Pooris: Omit the fresh chilli and chilli powder for simple, unseasoned version. Herb Pooris: Add 1 tablespoon finely chopped fresh coriander or mint to the dough. Bigger Pooris: Roll into 15 cm discs for larger puffed breads (they take 40-60 seconds per side). Sooji Pooris: Replace plain flour with sooji (semolina) for crispier texture.
Serving
Serve with: Potato curry, dal, pickles, chutneys, or curries Accompany: With fresh lime juice and onion slices Temperature: Serve immediately while hot and crispy Vessel: Serve in a basket lined with cloth to retain heat and crispness
Storage
- Best served immediately after frying
- Store cooled pooris in an airtight container at room temperature for up to 1 day (they become soft)
- Reheat in a 180°C oven for 3-5 minutes to re-crisp
- Do not refrigerate; pooris become limp in cold
- Do not freeze; texture becomes grainy when thawed
- Pooris are best fresh-made; they don't store well longer than 1-2 hours
These small discs of dough puff up into light, airy breads when fried. Lightly studded with pieces of fresh red chilli, they melt into your mouth and leave you with a warm, spicy glow. Pooris are Indian street food at its finest.
More like this
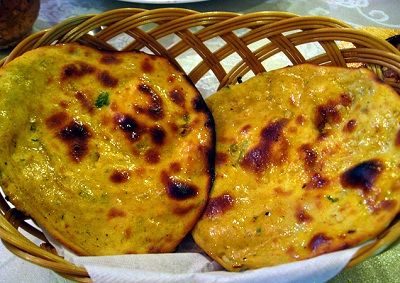
Missi Rotis
Missi rotis are wholesome, protein-rich flatbreads built on gram flour (chickpea flour) blended with wholemeal flour. The fresh herbs and spices make them deeply flavorful; they're quick to pan-fry and require no oven time. These are ideal served warm with dal, curry, or alongside soups. The dough rests for an hour, which develops gluten and makes rolling easier.
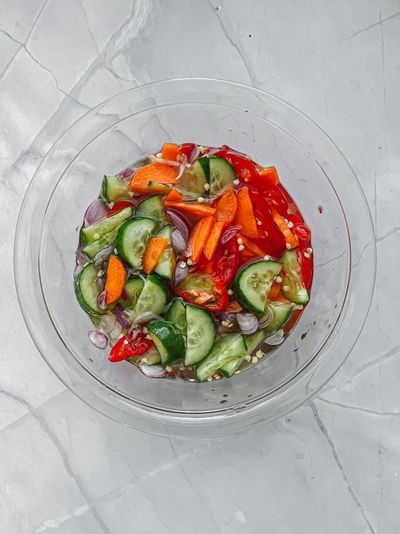
Ajad
A simple syrup of rice vinegar, palm sugar, water and salt is brought to a gentle simmer to dissolve the sugar, then cooled. Cucumber, shallot and chilli are sliced thin and combined in a small bowl. The cooled syrup is poured over. Rested for 10-15 minutes for the vegetables to wilt slightly into the dressing. Served in small individual ramekins as a dip, OR in a larger bowl as a side, with peanuts sprinkled on top.

Blood Orange Sorbet
A refreshing, jewel-bright sorbet made from tart blood orange juice infused with a hint of thyme and chilli, creating a sophisticated palate cleanser or light dessert. The deep crimson color and complex flavors make this an elegant choice for finishing a meal, and its intense acidity balances rich preceding courses.
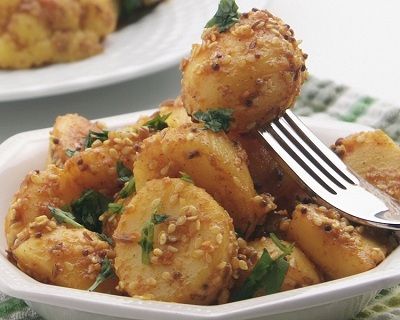
Bombay Potatoes
Bombay Potatoes is comfort food at its finest. Small potatoes are partially cooked, then coated in a richly spiced oil infused with seeds and aromatics. Some potatoes are mashed to create a creamy base, while others remain whole for texture. The result is a warm, golden, deeply spiced side dish that's utterly satisfying. This is a vegetarian staple of Indian home cooking.