
Croissants
The dough for this needs to be made 10-12 hours in advance.
Overview
Croissant dough is a laminated dough that requires patience and precise technique to achieve its characteristic flaky layers. The interplay between enriched dough and butter layers, combined with careful folding and resting, creates the golden, buttery texture that defines a perfect croissant. This dough demands attention to temperature control and timing throughout its preparation.
Ingredients
- 40 grams sugar
- 10 grams salt
- 300 ml cold water
- 17 grams fresh yeast
- 25 grams milk powder
- 500 grams strong flour
- 300 grams butter
- eggwash (1 egg yolk mixed with 1 tablespoon milk)
- Isosceles triangle template 14 x 18 cm
Method
The dough
- Dissolve the sugar and salt in one-third of the cold water.
- In a separate bowl, beat the yeast into the remaining water with a small wire whisk, then beat in the milk powder.
- Place the flour in the bowl of the electric mixer, then at low speed, using the dough hook, beat in first the sugar and salt mixture, then the yeast mixture.
- Stop beating as soon as the ingredients are well mixed and the dough comes away from the sides of the bowl(This should take no longer than 1 ½ minutes) do not overwork the dough.
Rising
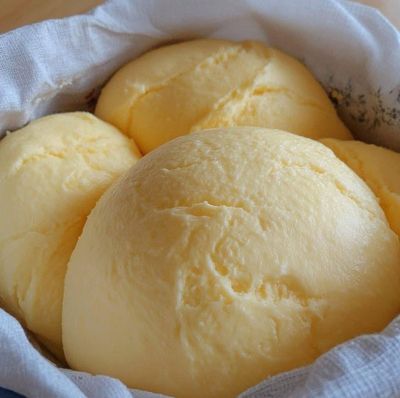
- Cover the dough with a tea towel and leave to rise in a warm place (about 24°C but not more than 30°C) for about 30 minutes. The dough should double in size.
Knocking back
- Knock back the dough by quickly flipping it over with your fingers to release the carbon gases; do not overwork the dough or it will become heavy. Cover with polythene and place in the fridge for 6-8 hours. (If the dough has risen again after an hour, knock it back again).
Rolling and shaping
- Cut a cross in the top of the dough.
- On a lightly floured surface, roll out the ball of dough in 4 places, making a quarter turn each time, so that it looks like 4 large 'ears' around a small head.
- Put the butter in the centre; it must be firm but not too hard, and about the same temperature as the dough.
- Fold the 4 'ears' over the butter, making sure that it is completely enclosed, so that the butter does not ooze out.
- Lightly flour the work surface, then carefully roll the dough away from you into a rectangle of about 40 x 70 cm.
- Brush off the excess flour from the surface of the dough. Fold the dough into 3.
- Wrap in polythene and refrigerate for at least 20 minutes. Repeat the process, rolling the dough in the opposite direction from before.
- Wrap and refrigerate as before. Repeat the process once more.
- Roll out the dough to a 40 x 76 cm rectangle, flouring the work surface very lightly as you roll.
- Flap up the dough twice to aerate it and prevent shrinkage, taking care not to spoil the shape of the rectangle.
- With a large knife, trim the edges, then cut the dough length-ways into 2 equal strips.
- Lay one short edge of the triangular template along one long edge of the dough and mark out the outline with the back of a knife.
- Invert the triangle and mark out the outline again. Continue this way until you have marked out 16-18 triangles, then cut them with a sharp knife.
- Arrange the triangles on a baking sheet. Cover tightly with polythene and refrigerate for a few moments; if the dough becomes too warm it will soften and crack.
- Place the triangles one at a time on the work surface, with the long point nearest you.
- Stretch out the 2 shorter points, then, starting from the short edge, roll up the triangle towards you; use one hand to roll the dough and the other to pull down the long point.
- Make sure that the central pointed end is in the middle and underneath so it does not rise up during cooking.
- As soon as they are shaped, place the croissants on a baking sheet, turning in the corners in the direction of the pointed end to make curved crescent shapes. Since the sides of the oven are always the hottest, the last row of croissants must face backwards or the points may dry out and burn.
- Lightly, brush the croissants with eggwash, working outwards, so that the layers of dough do not stick together, which would prevent the croissants from rising properly.
- Leave to rise in a very warm, humid and draught free place (24°-30°C) until they have doubled in size. This will take about 2 hours.
Notes
- Dough temperature is critical throughout; keep all surfaces, tools, and ingredients cool to prevent butter from melting into the dough
- The 6-8 hour cold rest allows gluten to relax and prevents the dough from shrinking during lamination
- Each turn (fold) doubles the number of butter layers; 3 turns create approximately 27 layers of butter and dough
- Temperature management during final proofing is essential; croissants must be shaped while cold and proof in a warm, humid environment
Serving
Serve freshly baked croissants warm, ideally within 2 hours of baking. Enjoy plain with butter and jam, or use as a base for sandwiches with ham, cheese, or chocolate. Can be served for breakfast, brunch, or as an afternoon tea pastry.
Storage
Croissants are best consumed fresh on the day of baking. Unfolded dough can be frozen for up to 1 month before shaping; thaw in the refrigerator overnight before final proofing. Shaped, unbaked croissants can be frozen for 2-3 days; bake directly from frozen, adding 5 minutes to baking time.
More like this

Pâte Brisée (Shortcrust)
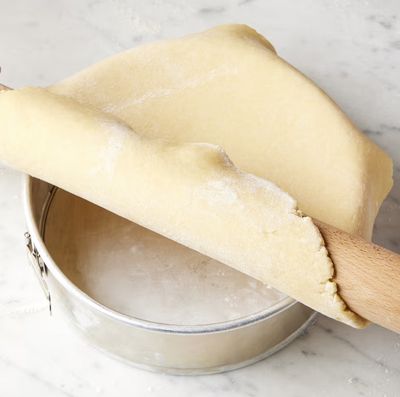
Pâte brisée is a classic French shortcrust pastry that serves as the foundation for elegant tarts and tartlets. Its tender, crumbly texture and neutral flavor provide a perfect base that complements both sweet and savory fillings without competing. The simple technique of rubbing fat into flour creates its characteristic short, delicate crumb.
Brioche Dough
The quintessential French enriched yeast dough featuring butter and eggs for unmatched richness and tender crumb. This silky, golden dough is the foundation for elegant brioches, pastries, and breakfast breads. The long refrigeration develops flavor and makes the dough easier to shape. A showstopper on any breakfast or dessert table.

Pâte à Choux (Choux Pastry)
Pâte à choux is a unique pastry made without fat in the dough itself, relying instead on steam for leavening to create light, hollow shells. Its versatility allows it to be piped into countless shapes for both sweet and savory preparations. The characteristic crispy exterior and hollow interior make it an essential technique in pastry work. IMPORTANT: The 'drying out' stage is critical for success.
Pâté à Foncer (Flan Pastry)
Pâté à foncer is a tender, crumbly pastry traditionally used as the base for flans and tartlets. Its delicate texture and neutral flavor provide an elegant foundation that doesn't compete with fillings. The technique of rubbing fat into flour by hand creates the characteristic short, crumbly texture that distinguishes this pastry.